







DISCLAIMER:
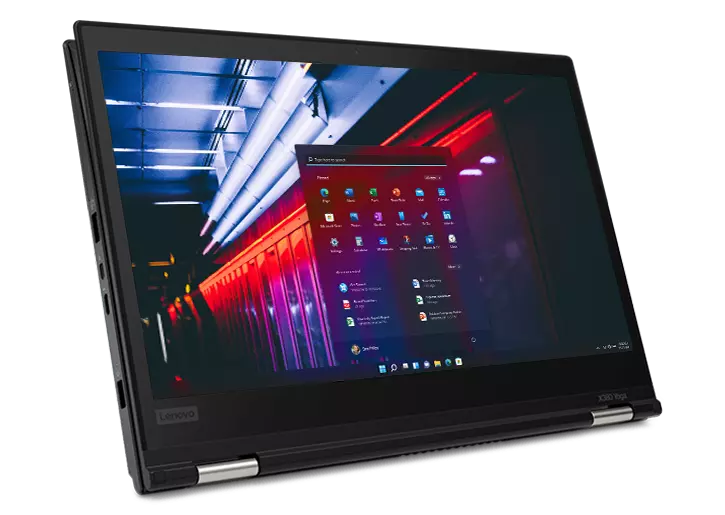
This OpenCore EFI works fine on my Thinkpad X380 Yoga.
As you embark on your Hackintosh journey you are encouraged to READ the entire README and Dortania guides before you start to get an understanding of the install process. It will save many a message instructing you to read the manual.
With that said I'm happy to help when/where I can. When you encounter bug or want to improve this repo, consider opening an issue or pull request. You can also find a wealth of knowledge on Reddit, TonyMacX86 or Google.
📖 Getting started
Meet the Bootloader:
- Why OpenCore
- Dortania's website
Recommended tools:
- Plist editor ProperTree
- Handy-dandy ESP mounting script MountEFI
- Cross-platform GUI management tools for OpenCore OCAT
- Py script that uses acidanthera's macserial to generate SMBIOS GenSMBIOS
- The Swiss army knife of vanilla Hackintoshing Hackintool
Resources
💻 My Hardware
| Category | Component | Note |
|---|---|---|
| Type | 20LJ | |
| CPU | Intel(R) Core(TM) i5-8350U CPU @ 1.70GHz | |
| GPU | Intel UHD 620 | |
| SSD | Lexar NM620 512GB M.2 NVMe SSD | Replaced cursed PM 981 which still doesn't work reliably. Read this Anti-Hackintosh Buyers Guide - Storage |
| Screen | 13.3" FHD 1920x1080 | Multi touch and pen* support working |
| Memory | 16GB DDR4 2400Mhz | |
| Camera | 720p Camera + IR Camera | |
| Audio | Conexant® CX8200 | I suggest trying several layout ID 3, 15, 21, 23, or 80 |
| Touchpad | ELAN v4 LEN2034 PS2 Interface | If the Trackpad is not working properly, try disabling the Trackpoint in the BIOS. |
| Wifi & BT | Intel AC 8265 and Bluetooth | Use AirportItlwm for your macOS version and enjoy native Wi-Fi control. |
| Ethernet | Intel I219-LM4 Gigabit Ethernet | |
| Input | PS2 Keyboard & I2CHID TrackPad (touchscreen and pen) | I'm using YogaSMC for media keys. The kext is in the folder but you must install the YogaSMC app separately. |
📦 Main software
| Component | Version |
|---|---|
| macOS Sequoia | 15.7.2 |
| OpenCore | v1.0.6 |
How to install macOS
- Create an installation media
- Download the latest EFI folder and copy it into the ESP partiton
- Change your BIOS settings according to the table below
- Boot from the USB installer (press
F12to choose boot volume) and start the installation process
| Menu | Setting | ||
|---|---|---|---|
| Config | USB | UEFI BIOS Support | Enable |
| Power | Intel SpeedStep Technology | Enable |
|
| CPU Power Management | Enable |
||
| CPU | Hyper-Threading Technology | Enable |
|
| Security | Security Chip | Disable |
|
| Memory Protection | Execution Prevention | Enable |
|
| Virtualization | Intel Virtualization Technology | Enable |
|
| Intel VT-d Feature | Enable |
||
| Anti-Theft | Computrace | Disable |
|
| Secure Boot | Disable |
||
| Intel SGX | Disable |
||
| Device Guard | Disable |
||
| Startup | UEFI/Legacy Boot | UEFI Only |
|
| CSM Support | No |
||
| Boot Mode | Quick |
Enable Apple Services
Config to allow you to use Apple Services (such as iMessage)
🗒️Note:
If you (still) can't login to iMessage you may need to contact Apple Support to unblacklist your AppleID (You can try opening the Message app from terminal to check the log to see if you're getting a Customer Code error, which is an indication that your AppleID got blacklisted. See more info here)
- Download (or clone) GenSMBIOS and run it in terminal
- Type
3to generate SMBIOS, then press Enter - Type
MacBookPro15,2 5, then press Enter - Open
EFI/Config.plist(I highly recommend using ProperTree) and navigate toPlatformInfo -> Generic - Add one of the script's result to
MLB,SystemSerialNumber, andSystemUUID - Replace
ROMwith your MAC Address (System Preferences -> Network -> Ethernet -> Advanced -> Hardware -> MAC Address, then remove all the colons:). Or you can also try using a real Apple MAC Address - Save and Reboot
- Check the Serial Number validity. Repeat step 5 and choose different result (or generate new set of SMBIOS) until you find invalid Serial Number
Audio Setup
The X380 Yoga has CX8200 for audio which requires the boot-arg or device property below. You can use the boot-args to initially setup your config.plist file as suggested in the guide or simply add the device property. Everything should work, built-in microphone, speakers, headphone jack and microphone.
NVRAM:
| Key | Value |
|---|---|
| boot-args | alcid=23 |
DeviceProperties
| Key | Type | Value |
|---|---|---|
| PciRoot(0x0)/Pci(0x1F,0x3) | Dictionary | |
| layout-id | Data | 0f000000 |
Enable Intel WLAN cards
Although the Intel AC-8265 Card is compatible with both kexts (use either one or the other), there are Pros and Cons to both of them (check the FAQs for other differences):
[!IMPORTANT] WiFi Kext Compatibility: The included
AirportItlwm.kextis specifically for macOS Sequoia.
If you plan to install macOS Sonoma, you MUST replace this kext with the version compiled for Sonoma. Using the wrong version will result in boot failures or non-functional WiFi.
-
AirportItlwm: (used in macOS Sonoma)
- Pro: Can be used during macOS Setup/Recovery which is not possible with
itlwm.kext - Pro: Supports Location Services and "Find My Mac"
- Pro: Connects faster to Wi-Fi Hotspots than
itlwm.kext - Con: Doesn't perform as well as
itlwm.kext - Con: Can't connect to hidden WiFi Networks
- Con: Requires the correct kext per macOS version, so running multiple version of macOS requires multiple versions of this kext controlled via
MinKernelandMaxKernelsettings
- Pro: Can be used during macOS Setup/Recovery which is not possible with
-
itlwm.kext (used in Sequoia)
- Pro:
itlwm.kextworks across multiple versions of macOS - Pro: Loading webpages feels a lot quicker than with
AirportItlwm - Pro: Can connect to hidden WiFi Networks
- Pro: Does work with iMessage and FaceTime
- Con: Requires HeliPort app to connect to Wi-Fi hotspots, so it can't be used during macOS Setup/Recovery
- Con: Doesn't support Location Services
- Pro:
-
Pre-compiled WiFi kexts for other versions of macOS can be found in the Additional Files section! You will need them if you want to run other macOS versions than Sonoma or Sequoia!
🗒️Note:
My config uses
AirportItlw.kextby default since it allows accessing the internet during macOS installation (unlikeitlwm.kextwhich requires an additional app to do so). Currently, AirportItlwm kexts for macOS Sequoia is included but you must patch using OCLP-Mod. If you want to use itlwm, disable AirportItlwm (all variants) and enable itlwm in the config.plist instead. Next, download the Helipad app, run it and add it to "Login Items" (in System Settings) so that it starts automatically with macOS.
CPUFriend power management
Generate CPUFriendDataProvider or ssdt_data.aml (choose one) for your machine here or use the ssd_data.aml file provided. My files are set for power conservation over performance. Highly recommended that you use power management.
USB Port Mapping
While first port mapping I followed the Dortania guide here with USBInjectAll.kext install... when doing so the internal USB ports did not show up and the cameras, touch screen, and bluetooth did not function. I noticed on the USBmap tool screen that RHUB was showing so I Googled it and it brought me back to the Dortania guide here. I added the SSDT-RHUB.aml to the APCI folder rebooted and all the ports showed up. I then mapped the USB ports creating the included USBMap.kext file.
Enable HiDPI
- Disable SIP
- Run the following script in Terminal
bash -c "$(curl -fsSL https://raw.githubusercontent.com/xzhih/one-key-hidpi/master/hidpi.sh)" - Follow the instructions, then reboot
- Re-enable SIP (if desired)
Or try an alternative method
Enable multimedia keys, fan & LEDs control
- Download YogaSMC-App and mount it. This is a custom build which fixes the "Failed to open Preferences" issue in Ventura and newer
- Double-click the YogaSMC prefPane to install it
- Drag the
YogaSMCapp into the "Programs" folder and run it - Click on the icon (
⌥) in the menu bar and select "Start at Login" - Now you can control performance profiles, fan speed and other settings
Use PrtSc key as Screenshot shortcut
Super useful shortcut that I wish I had it on my previous MBP. Default is ⌘⇧5.
- Open SystemPreferences.app
- Go under
Keyboard > Shortcuts > Screenshots - Click on
Screenshot and recording optionsfield - Press
PrtScon your keyboard (it should came out asF13)
Use Thinkpad Assistant
- Get a pair of Patch & SSDT from Samples folder
- Compile SSDT (ex.
iasl -vo SSDT-X380-KBRD.dsl) - Copy
SSDT.amlto EFI/OC/ACPI - Apply patch on
config.plstwith OCAT - Download Thinkpad Assistant
- Extract & Copy to Applications folder
- Start Thinkpad Assistant & Tick 'Launch on Login' in Menubar
- Reboot
Faster macOS dock animation
This enables auto-hide and speeds up the animation
- Run the following script in Terminal
defaults write com.apple.dock autohide-delay -float 0; defaults write com.apple.dock autohide-time-modifier -float 0.5; killall Dock
Fix Windows Time Sync
RealTimeIsUniversal registry key still works in Windows 8, 10, and 11! Just tested it by myself. The instructions to use this method are explained lot of times everywhere, for example in this answer.
I will replicate the answer here:
Win+S, regedit, Enter.
Navigate to the key:
HKEY_LOCAL_MACHINE\SYSTEM\CurrentControlSet\Control\TimeZoneInformation.
Create new DWORD (32-bit) Value, name it RealTimeIsUniversal. Set its value to 1.
After this is done, just reboot your machine. After it is up and running again, let Windows set time automatically (click on the current time in tray, Date and Time Settings > Set Time Automatically), this time it will not mess with it.
Boot process tweaks
| Menu | Setting | What does it do? | ||
|---|---|---|---|---|
| Misc | Boot | ShowPicker | False |
Skip bootloader page |
| UEFI | Audio | PlayChime | Disabled |
Always silent boot |
Setup hibernation and sleep
Script that performs auto sleep/hibernate at low battery.
-
Open terminal
-
Enter commands below one by one
Settings for AC:
sudo pmset -c standby 1
sudo pmset -c hibernatemode 0
Setting for battery:
sudo pmset -b standby 1
sudo pmset -b standbydelayhigh 900
sudo pmset -b standbydelaylow 60
sudo pmset -b hibernatemode 25
sudo pmset -b highstandbythreshold 70
Settings for all:
sudo pmset -a acwake 0
sudo pmset -a lidwake 1
sudo pmset -a powernap 0
To restore default system settings run
sudo pmset restoredefaults
Grant/remove accessibility permissions to any app
tccutil with extended capabilities allowing you to grant/remove accessibility permissions to any app.
I never recommend manually modifying any system database because if a mistake is made you risk boot-looping your computer. This is why this tool is using the undocumented TCC.framework to make changes just like macOS does internally.
Requires SIP and AMFI to be disabled.
Currently can only add one or all (not recommended) services at a time. Using reset All is fine.
tccplus [add/reset] SERVICE [BUNDLE_ID]
Services:
 - All
 - Accessibility
 - AddressBook
 - AppleEvents
 - Calendar
 - Camera
 - ContactsFull
 - ContactsLimited
 - DeveloperTool
 - Facebook
 - LinkedIn
 - ListenEvent
 - Liverpool
 - Location
 - MediaLibrary
 - Microphone
 - Motion
 - Photos
 - PhotosAdd
 - PostEvent
 - Reminders
 - ScreenCapture
 - ShareKit
 - SinaWeibo
 - Siri
 - SpeechRecognition
 - SystemPolicyAllFiles
 - SystemPolicyDesktopFolder
 - SystemPolicyDeveloperFiles
 - SystemPolicyDocumentsFolder
 - SystemPolicyDownloadsFolder
 - SystemPolicyNetworkVolumes
 - SystemPolicyRemovableVolumes
 - SystemPolicySysAdminFiles
 - TencentWeibo
 - Twitter
 - Ubiquity
 - Willow
Usage Example: Get application bundle ID:
grep 'BundleIdent' -A 1 /Applications/<APPLICATION NAME>/Contents/Info.plist
Pass result to tccplus
user@iMac ~ % grep 'BundleIdent' -A 1 /Applications/Discord.app/Contents/Info.plist
    <key>CFBundleIdentifier</key>
    <string>com.hnc.Discord</string>
user@iMacc ~ % grep 'BundleIdent' -A 1 /Applications/zoom.us.app/Contents/Info.plist
    <key>CFBundleIdentifier</key>
    <string>us.zoom.xos</string>
user@iMac ~ % ./tccplus add Microphone com.hnc.Discord
Successfully added Microphone approval status for com.hnc.Discord
Advanced energy management
acwake: wake the machine when power source (AC/battery) is changed (value = 0/1)
lidwake: wake the machine when the laptop lid (or clamshell) is opened (value = 0/1)
powernap: enable/disable Power Nap on supported machines (value = 0/1)
standbydelayhigh and standbydelaylow specify the delay, in seconds,
before writing the hibernation image to disk and powering off memory for Standby.
standbydelayhigh is used when the remaining battery capacity is above highstandbythreshold(has a default value of 50 percent),
and standbydelaylow is used when the remaining battery capacity is below highstandbythreshold.
hibernatemode supports values of 0, 3, or 25. To disable hibernation, set hibernatemode to 0.
hibernatemode = 0 by default on desktops. The system will not back memory up to persistent storage. The system must wake from the contents of memory; the system will lose context on power loss.
hibernatemode = 3 by default on portables. The system will store a copy of memory to persistent storage (the disk), and will power memory during sleep. The system will wake from memory, unless a power loss forces it to restore from hibernate image.
hibernatemode = 25 is only settable via pmset. The system will store a copy of memory to persistent storage (the disk), and will remove power to memory. The system will restore from disk image. If you want "hibernation" - slower sleeps, slower wakes, and better battery life, you should use this setting.
✅ What's working
- Intel HD 620 Graphics
including graphics acceleration - Battery management
- USB ports
- Internal camera
working fine on FaceTime, Skype, Zoom and others - Sleep / Wake / Shutdown / Reboot
- Intel WiFi & Bluetooth (thanks to itlwn & Heliport )
- iMessage, FaceTime, App Store, iTunes Store
(Requires valid SMBIOS) - Speakers and headphones combo jack
- Microphone
- Keyboard map and hotkeys with YogaSMC
- Multi-Touch Screen
Touchscreen feels more natural than using Touchpad (Touchpad gesture enabled). Pen also working - SIP and FileVault 2 can be turned on
- Micro SD Card Reader
Kext removed in 1.0.6 update
⚠️ What's not working
- Safari DRM
Use Chromium engine to watch Apple TV+, Amazon Prime Video, Netflix and others - Fingerprint reader -
No. Don't expect macOS driver any time soon. - Samsung PM 981 NVME drive -
Still unstable. Could work for some, not for others. SeeAnti-Hackintosh Buyers Guide - Storage - Sidecar Wireless
doesn't work without apple native WIFI card
🔄 Not tested
- Apple Watch Unlock
- WWAN
- AirDrop
- HDMI
- Thunderbolt
🔥 Power consumption and thermals
Sequoia
| Idle State | Max Frequency | 2 Thread Frequency | All Thread Frequency | GPU Max Frequency |
|---|---|---|---|---|
 |
 |
 |
 |
 |
Sonoma
| Idle State | Max Frequency | 2 Thread Frequency | All Thread Frequency | GPU Max Frequency |
|---|---|---|---|---|
 |
 |
 |
 |
 |
⏱️ Benchmarks
| CPU | Single-Core | Multi-Core |
|---|---|---|
| Geekbench 5 | 689 | 2670 |
| GPU | OpenCL | Metal |
| Geekbench 5 | 4191 | 3683 |
| macOS Sequoia 15.2, EFI release 1.0.3, CPU: i5-8350U |
| CPU | Single-Core | Multi-Core |
|---|---|---|
| Geekbench 5 | 755 | 2479 |
| GPU | OpenCL | Metal |
| Geekbench 5 | 2819 | 2471 |
| macOS Sonoma14.7.2, EFI release 1.0.3, CPU: i5-8350U |
- Apple for macOS.
- Acidanthera for OpenCore and all the lovely hackintosh work. .
- CorpNewt for ProperTree, CPUFriendFriend and SSDTTime
- Dortania Made the OpenCore Install Guide which was used to make this EFI.
- ic005k for OpenCore Auxiliary Tools
- benbaker76 for Hackintool
- zhen-zen for YogaSMC
- r/hackintosh community for helping me find solution to various issue I came across