

This example demonstrates an animated battery fuel gauge on an e-paper display, using the E-Paper Bundle 2 (eINK Click + Display) with the FRDM K64 Click Shield on the FRDM-A-S32K312 board. It simulates a battery storage system sweeping from 0% to 100% and back, and renders the simulated charge level - title text, a segmented battery icon and a large percentage readout on an SSD1675A e-paper panel driven over an LPSPI channel.

This example was developed using the FRDM Automotive Bundle for S32K3 + S32M27. To download and install the complete software and tools ecosystem, use the following link:
- Personal Computer
- Type-C USB cable
| Boards | Images |
|---|---|
| - FRDM-A-S32K312 | 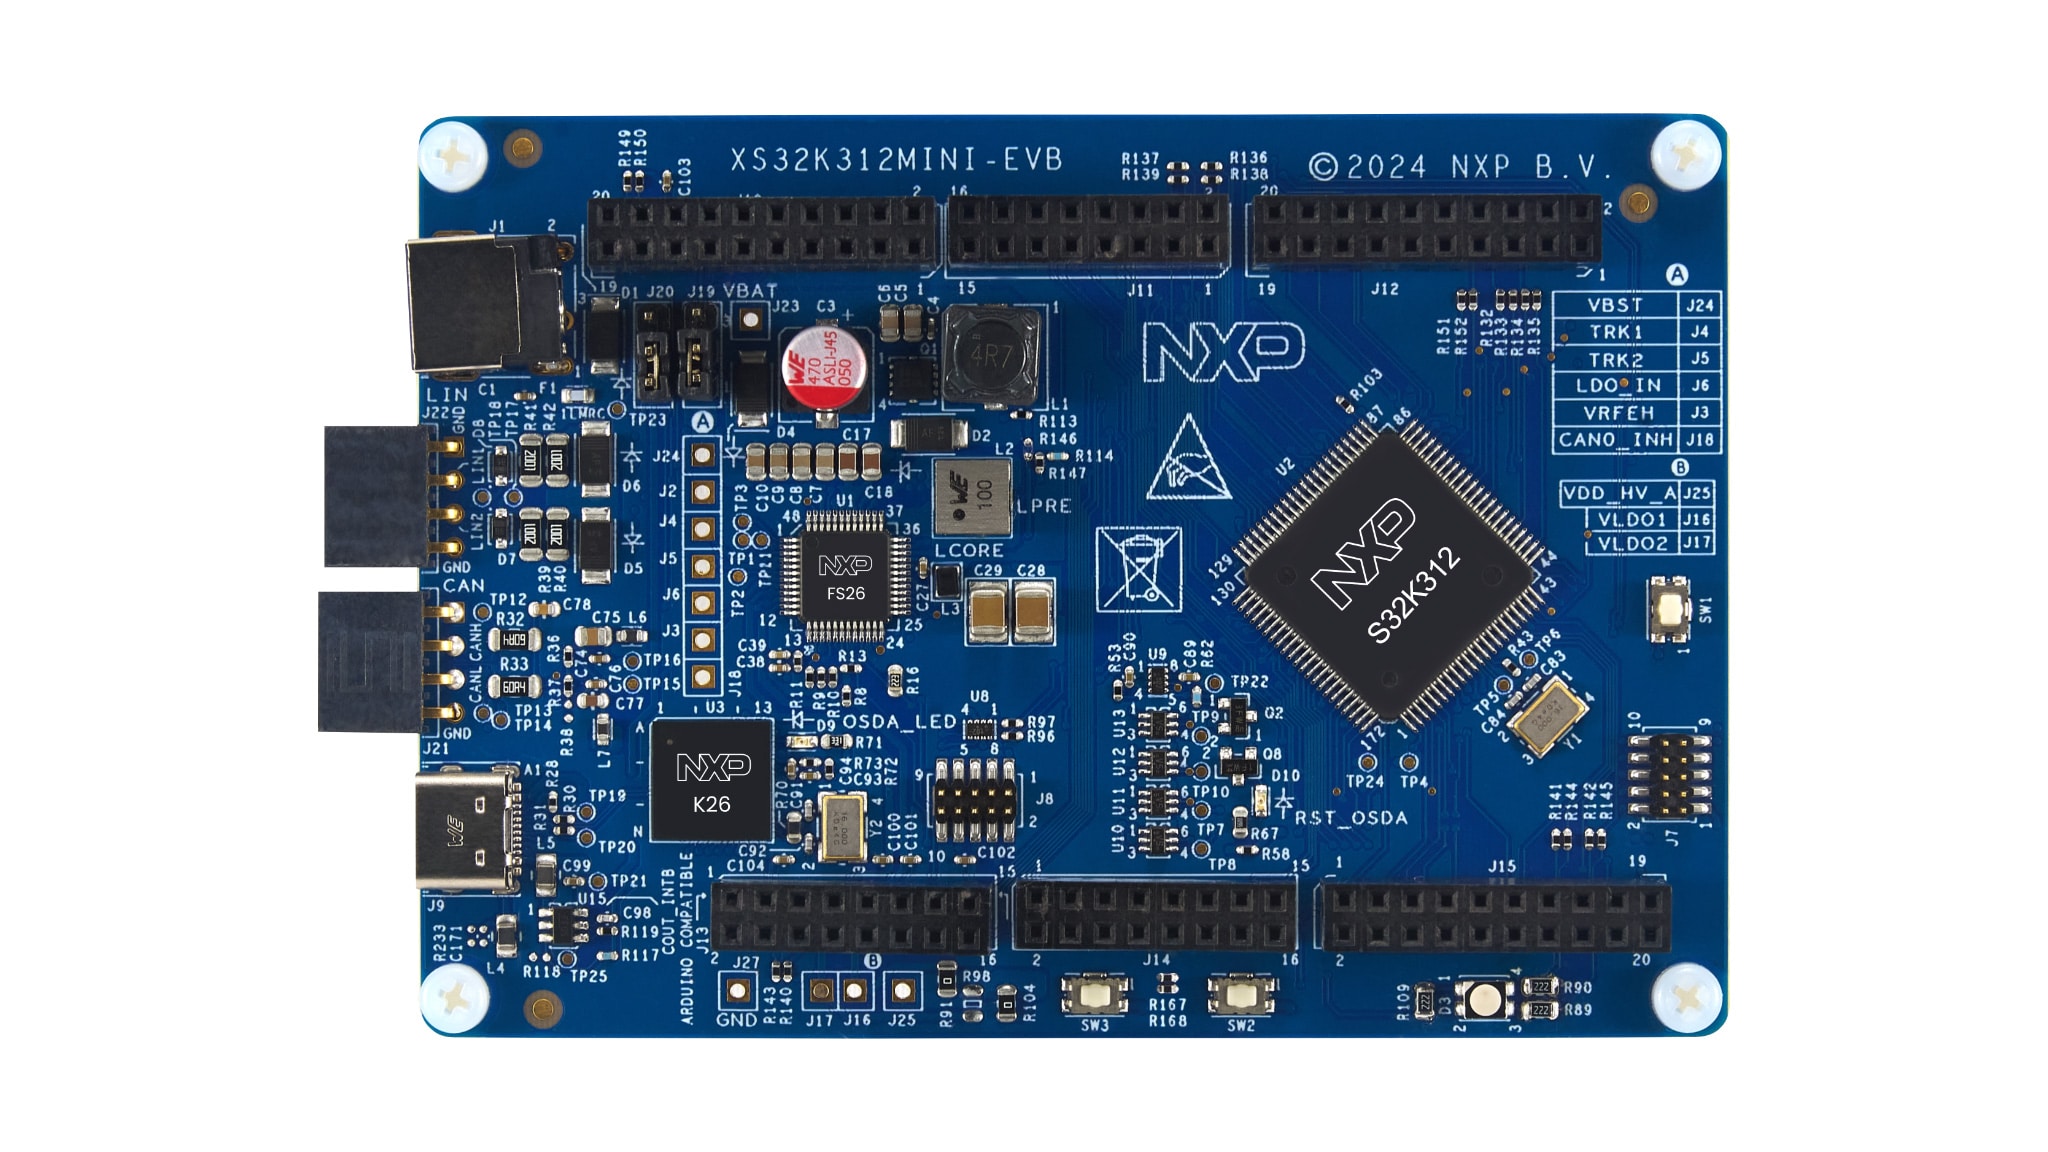 |
| - FRDM K64 Click Shield |
|
| - E-Paper Bundle 2 (eINK click) | |


| FRDM-A-S32K312 | I/O | Click Board | Click Pin | Description |
|---|---|---|---|---|
| PTB14 LPSPI1_SCK | → | eINK click | SCK | SPI clock |
| PTB16 LPSPI1_SOUT | → | eINK click | SDI | SPI data out (MOSI) |
| PTB17 GPIO | → | eINK click | CS | Chip select (active low) |
| PTA1 GPIO | → | eINK click | D/C | Data/Command select |
| PTA8 GPIO | → | eINK click | RST | Reset (active low) |
| PTD2 GPIO | ← | eINK click | BUSY | Busy status from panel |
| GND | → | eINK click | GND | Ground |
| VDD_PERH | → | eINK click | 3V3 | Power Supply |
- Connect the Type-C USB cable to PC and FRDM-A-S32K312 board for power supply and debugging
-
Open S32 Design Studio IDE, in the Dashboard Panel, choose Import project from Application Code Hub.

-
Find the demo by searching: E-Paper Battery Display
-
Open the project, click the GitHub link, S32 Design Studio IDE will automatically retrieve project attributes, then click Next>.

-
Select main branch and then click Next>.
-
Select your local path for the repo in Destination->Directory: window. The S32 Design Studio IDE will clone the repo into this path, click Next>.
-
Select Import existing Eclipse projects then click Next>.
-
Select the project in this repo (only one project in this repo) then click Finish.


-
In Project Explorer, right-click the project and select Update Code and Build Project. This will generate the configuration (Pins, Clocks, Peripherals), update the source code and build the project using the active configuration (e.g. Debug_FLASH). Make sure the build completes successfully and the *.elf file is generated without errors.
Press Yes in the SDK Component Management pop-up window to continue.
-
Go to Debug and select Debug Configurations. There will be a debug configuration for this project:

 Configuration Name                  Description
 -------------------------------     -----------------------
 $(example)_debug_flash_pemicro      Debug the FLASH configuration using PEmicro probe
Select the desired debug configuration and click on Debug. Now the perspective will change to the Debug Perspective. Use the controls to control the program flow.


The demo drives an SSD1675A/IL3897 (HINK-E0213A22/TSE0213A189/GDEH0213B72) e-paper panel over SPI to render an animated battery fuel gauge, simulating a battery storage system charging and discharging:
-
Display Initialisation: At start-up the panel is hardware reset and configured through the SSD1675A command sequence (block control, driver output, border, drive voltages, RAM window) with custom full and partial waveform LUTs uploaded, then cleared to a white background.
-
Battery Gauge Rendering: A framebuffer-based drawing layer renders the title lines ("FRDM-A-S32K312" and "Battery Gauge"), a segmented battery icon, and a large "NN%" percentage readout using a built-in 5x7 bitmap font.
-
Continuous Animation: The main loop sweeps the simulated charge level from 0% up to 100% and back down in 10% steps, redrawing the framebuffer and performing a flicker-free partial refresh (partial waveform, 0x22=0x04) on each frame, with a periodic full refresh (0x22=0xC4) to clear ghosting, providing an always-on, at-a-glance battery indicator with no user interaction required.

For general technical questions related to NXP microcontrollers, please use the NXP Community Forum.





Questions regarding the content/correctness of this example can be entered as Issues within this GitHub repository.
Note: For more general technical questions regarding NXP Microcontrollers and the difference in expected functionality, enter your questions on the NXP Community Forum




| Version | Description / Update | Date |
|---|---|---|
| 1.0 | Initial release on Application Code Hub | October 1st 2026 |