AutoSchedule is an application designed to automate the following:
- Downloading the Section Schedule Daily Summary from Destiny and creating a sorted/formatted report for:
- ABSW
- Belmont Center
- Golden Bear Center
- San Francisco Center
These instructions will help you get started with using the application.
The following must be installed:
- Google Chrome
- Microsoft Excel
- Access to Destiny via CalNet ID
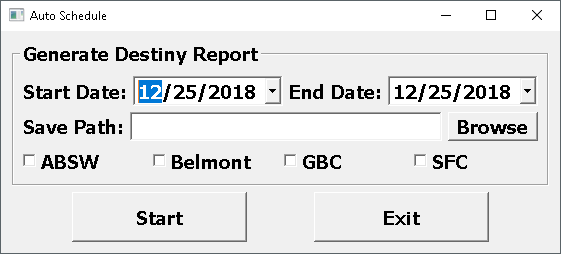
- Check the box next to the function(s) you would like to use
- Fill in the require fields.
- Click "Start" when ready. The output files will be saved to your "Save Path" location.
- When prompted in Chrome, log in using CalNet credentials.
- Click "Exit" to close the application.
Note: Runtime may vary depending on the number of days/classes that need the signs to be created for.
These instructions will get you a copy of the project up and running on your local machine for development.
- Python 3.6 - The scripting language used.
- Pandas - Data structure/anaylsis tool used.
- Selenium - Web crawling automation framework.
- Chrome Webdriver - Webdriver for Chrome browser. Use to control automation with Selenium.
- xlsxwriter - Used to create Microsoft Excel documents (Daily Schedule)
- PyQt5 - Framework used to create GUI.
- QtDesigner - GUI builder tool.
- PyInstaller - Used to create executable for release.
Run the following command to installer all the required Python modules:
pip install -r requirements.txt
To run the application:
.\AutoSchedule.py
The project files includes a batch file (Windows platform only) with commands to run to compile into an executable.
Other development platforms can run the following command in Terminal:
pyinstaller AutoSchedule.spec .\AutoSchedule.py
You may need to modify the file paths if not in same current working directory.
- Patrick Yu - Initial work - patrickgod1 - UC Berkeley Extension